2016-04-27

Saga: Crescent and the Cross Milites Christi Warband WIP 2

Back again with an short updated off my progress with the Milites Christi warband. The Knights are close to finished some minor basing details left.

I have realised how hard it is to paint large black cloth area. Especially the horse barding was hard to get nice. But overall am I pleased with the result. I used more decals from battle flags for the shield markings and the markings on the chests and mantels.

Here are the some pictures:


Next up is the crossbow men and foot soldiers. I am thinking about doing a short description when I paint the foot soldiers of my but I have not decided yet. The future will tell.

2016-04-12

Saga: Crescent and the Cross Milites Christi Warband WIP 1

I have continued painting on my Milites Christi Warband. Progress so far is all models are primed grey and painted black.

Horse are finished for the Templar Knights and the leader.
Decals are applied for the horse barding and I am pleased with the result, hard o get a good fit with the large decals on the curved surface. But I am like the decals from Battle flag. They are printed with very high detail. Only flaw is that I chose a black the for my army because the decals should be applied over white background.


Next step is to paint the knight models. Then continue with the infanteri teams to support the knights.

Happy gaming until next time! 

2016-04-06

Saga: Cresent and the Cross Milites Christi Warband

Hello all. Back to more modelling again and new rules system.


I have had a few demo games and trial games of Saga and found this system to be easy and elegant. And I am not afraid to jump in to a new rules system. I have scanned the net and look at the different force available. I realised that the latest book and rules released by Studio Tomahawk was the most interesting for me. Then was the choice quit easy, how don´t like knights with high moral values and think the are above everyone next go GOD him self. Milite Christi warband is collection for all the knightly orders at the holy land.

My planed force
4pts:
4 Milites Christi Brothers (Mounted Hearthguard)
8 Milites Christi Sergeants (Warriors on foot)
8 Milites Christi Sergeants with Crossbow ( Warriors on foot)

Now I have chosen a force, next step models. I am not fond of 28mm horse in metal because they are so top heavy. There are a few companies that make plastic but the most reason one is Fireforge Games. They have their on game system Deus Vult and a 28mm miniature line for this game that would suit my needs.
Current status assembled and primed, I also have unassembled models for additional 8 footmen and 16 knights.


Next step is to air brush the horse and paint them black. I will paint them black with white cross version. This is my inspiration.

I will keep you posted for further progress.

2016-04-01

Gothcon XL summery and thoughts.

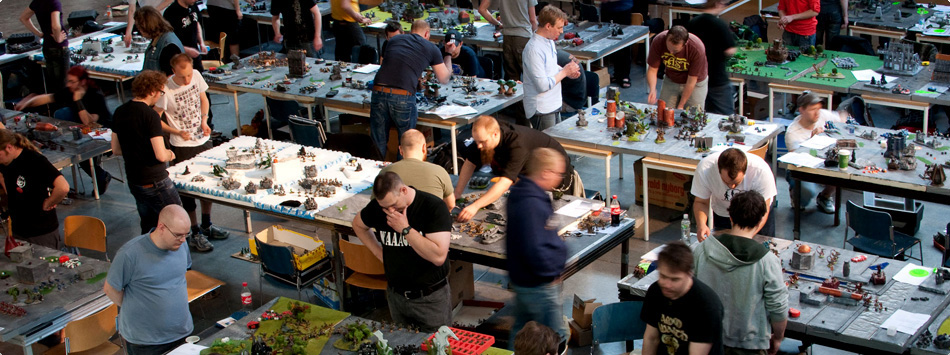
A couple of days have passed sins Gothcon XL in Gothenburg Sweden ended and I have had time to reflect on the high point of the hobby year. It was the first time for me to demo a game on an convent and also the first time to be part of my gaming club Yggdrasils endeavours at Gothcon.


Short summery of the convent:
I spent two hole days at Gothcon. Friday started with setup of guildball corner in the Yggdrasil gaming room and tape flyers for Guildball and X-wing demonstrations all over the Gothcon area. After that was it time for some serius gaming. I have looked at Pike & Shot from Warlord games and there was an large scale battle planed. I was just in time for it to start (see pictures below). I played roughly half the game and it took only 4 hours.
We took a proper lunch at the local China restaurant. then was it time for first role-play gaming for me in several years. We had booked a session for the new Mutant age 0 addon with robots! Only bummer was that it was cancelled because one game master had to leave. This was a disappointment but we went and had a nice indi roleplay game instead. This was the Friday gone but with allot of nice meetings and gaming.

Yggdrasil game room!
Saturday was my plan to demonstrate Guildball the hole day. We open at 10:00 and there where some people that wanted to play directly. In total do I demonstrated for 16 people during the day. I also managed to play one complete game for my self and I lost horribly to the nasty morticians. But I learned that they are sneaky and evil typ of game play. After 10 hours of demonstration was I abit tired and tried to get some shopping done before I had to leave. I tested Star realms and I liked it and bought the complete range directly and played two additional games with all the expansions.

We also witnessed the world largest Caracsonne game, it continued for 3 days straight. They used no farmers on this size :)

High points:
+ Lots of people played at the Guildball table and seamed to like it.
+ Tried Pike & Shot in an very large game (pictures below)
+ Constant flow and interest for the Yggdrasil game room. It´s where I demonstrated Guildball.
+ Star realms was a nice small filler game.

Low points:
-  No Mutant roleplay because one game master had hinder, we played some other indi roleplay instead but still a bit down.
- Should be sun and 15deg C, instead we had rain and gloomy weather the hole weekend.


That was all for this weekend and Gothcon  XL (2016). I had a lovely time and will be there next year to and hopefully demonstrate some new game for the fellow geeks.

Until then Happy gaming.

2016-03-03

Feldmaster: Revolutionary miniatures carrying case

New intressting carrier design.
I will see if I will make an investment for my new Saga warband with allot of long and pointy sticks.


2015-12-30

Switch control from Möllehem part: 3 (programming part 1)

Time for the programming trials to comes. I have placed allot of thoughts how to create this post in a structured way but it´s not entirely simple. But I will do my best I hope you will follow the simpleness of this system.

I will create a simple example that is based of my setup.
Short description of the setup:

Setup 

Step 1: Download Android device that speaks with the electronics (decoders).
Here is a link to the site at Google play:
https://play.google.com/store/apps/details?id=com.bluetoothtest
Install it and your good to go.

Step 2: Connect the Android device to the electronics.
Connect power to the Loconet terminator.
The blue diode should blink rapidly on the Smart phone interface box


Step 3:
Search for blue tooth devices on your andriod device and you will find the Loconet "xx"
Connect and write in code 1234
Open MGP application previously installed. Now you should see all the different decoders that is connected to your Loconet grid.


Step 4: Name all the different decoders. (good start)
Open each decoder and rename them to a logical name based on your layout


First programming. Simple servo switch command from panel buttons

Step 1: Note the SV nr on the Servo decoder and the position 1-5 of the intended servo. This will be the adress for the servo.

Step 2: Open the Panel decoder
Expand the input page

Go to the correct button based on which input is placed on the panel decoder board.
State if it´s a push button or switch button. If push button use "toggel" option.
Add the servo adress that should be trigged by the push button. The servo adress is the servo decoder adress for the first servo and then +1 for each servo connected to that decoder. For instance I want to trigger servo 3 on servo decoder with adress 40 would give me the servo adress 42 (40+2).

Step 3: Adjust Servo end points and direction to suite the implementation
Open Servo decoder
Find the servo and adjust en angle of the end points, easy to live and trim until no more stalling from the servos. It´s also possible to change speed and direction of of servo. This important to get the correct closed or throw message on the Loconet from the servo decoder.


This was all for the initial programing. With this easy setup can you control servos with simple push buttons. Next time will I show more of the LED programing and some more advanced functions.


2015-12-13

Switch control from Möllehem part: 2

Now I received all the parts to continue my switch control panel so here is part 2 in the series.
I will use following schematics for this simple panel:

I have test mounted them on the universal circuit board. This is to easily solder the components and draw the wires to the panel decoder. On top of the circuit board will I mount a Plexi glass board with the holes drilled for the buttons, LED´s and paint the routing on according to the schematics above.

Here is the first test mount:

Next step solder the push buttons and the led´s. Connect the push buttons to the common 0V that comes from the panel decoder and the output goes back to the panel decoder at the correct input position 1-16. It´s important to be meticulous and write down which button is connected to which input position because each push button will get an address and these will be used for the programming later.
Panel decoder
LED driver for 12 LED´s

The LED´s are drive from a separate LED driver board that will be connected to the panel decoder. Each LED driver board can operate up to 12 LED´s. There is a 16pin flat cable that needs to be split and soldered to the correct LED.

I have soldered the first 3 buttons and LED´s to the circuit board. Also mounted all the circuit boards on an very temporary holder to start programing and adjusting the servos.

With my small temporary board and turnout mount will I try the programming of panel decoder, led driver and servo decoder. But more about that in my next post.

LinkWithin

Related Posts Plugin for WordPress, Blogger...